Getting Started Flying FPV Drones
Flying drones is fun. I mean it's really truly hard, but also incredibly challenging and rewarding. My wife and kids like to joke that I spend more time repairing drones than actually flying them. I think anyone who gets serious about this hobby can relate to that easily. But it's not just about fixing broken stuff, it's about iterative improvements, testing, having fun, hitting limits, and repeating over and over.
Before I go much further, I'd like to say the majority of links below are affiliate links which means I'll get a small commission if you buy anything after clicking one of the links below. With that out of the way, let's continue on!
I honestly think the thing that really made flying FPV a serious hobby for me was when I finally started flying with a GoPro. I remember my first test with the camera. I was scared shitless because I thought if I crashed I would destroy my new expensive gear and regret my impulsive decisions forever. But that didn't happen, I had a pretty good rip, and it was at the moment when I saw my flight, fully stabilized and in glorious 4K resolution, that I appreciated all the time and effort that made this final step possible. I mean, this is literally what it looked like when I started flying last summer. And now, several months later, after much trial and error, lots of equipment changes, I'm flying at this level.
So how do you get into this hobby? Let's start with some equipment decisions, and I'll provide a few options in each category.
Controllers
This is pretty important and probably not the thing you're going to think of first but this is what I'd spend the most money on first. Honestly I think you can jump into this hobby with only purchasing a decent controller and I'll tell you why. With a good controller you can practice flying drones on a simulator. I know this probably doesn't sound like much fun since drone simulators aren't as enjoyable as being one with your drone, but before you sink a lot of additional money into the hobby, wouldn't it be great to feel confident enough in your flying that you wouldn't have to worry so much your first time flying with real expensive gear? Aside from simulators, you want to invest a bit more here to ensure your controller can grow with you in this hobby.
Budget Friendly
Iflight IF8
IFlight makes some of the best drones out there, though they aren't as well known for their controllers. This one is more affordable, but has some great features which should serve you well if you want to save money for other components. It has OpenTX, so it should work well with lots of drone receivers. It has a much more compact footprint so it will pack easily with the rest of your gear and it will feel familiar if you're used to gaming controllers. It also has a built-in battery with built-in USB-C charging, so if you're just getting started it will be one less thing to worry about initially.Upgradable Work Horse
Radiomaster TX16s
This is the controller that I use, and it has never let me down. I think it's not as modern as some other more expensive transmitters, but it has one important feature, it's built on open source software called OpenTX which means it has a community of developers who actively maintain it, and it supports multiple receiver protocols so you can fly many drones with receiver support out of the box. Another great feature is the high quality hall gimbals these come with for buttery smooth stick control. Another great feature is it comes with an open module bay. That means if you decide you want to fly with better range and add TBS Crossfire, you have that option.Drool Worthy
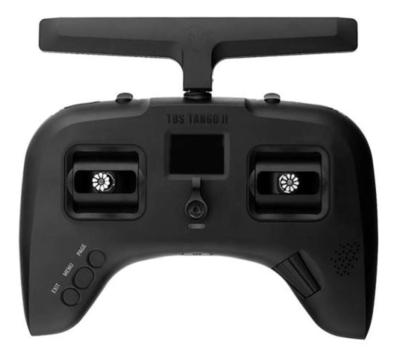
TBS Tango 2
IMO, this is the most modern controller on the market with the best form factor. For gamers, this controller will feel more natural in your hands, the build quality is up there with the best. The makers of this controller, Team Black Sheep, make some of the best respected FPV equipment available. This would have been the controller I bought except it was completely sold out when I was in the market. I think availability is not as much of an issue right now. Best yet, it has TBS Crossfire built-in, which means you can start flying with Crossfire compatible receivers right away, something I wish I hadn't waited to do.
Goggles

A good pair of goggles will serve you well, but nailing the right pair right out of the gate isn't as important in my humble opinion. Personally I'm happy I started out with a cheaper pair of goggles, and I kind of wish I had more opportunities to compare mine against others before I decided to shell out > $500 on a top-of-the-line pair of analog goggles. More on that later. Here's what I'd recommend for anyone just starting out.
Best Value
Eachine EV800D
These are really solid box-goggles for the $100 range. The built-in diversity receiver is well respected in the community, and I'd have to say it might even do better than other higher end goggles that offer built-in receivers. The fit and finish isn't really there, the built-in battery is positioned in front of the screen so it pulls the goggles down your nose, the wimpy headband it comes with doesn't help fight this battle. The screen resolution is also fairly lackluster. You can see some examples of it in my earlier flight videos. With the negatives on the table, I think where it shines is dependable reception range, affordability, (can't fly FPV without goggles 🤦 ), and when you finally outgrow it, you can detach the screen so friends can tag along and watch you fly. (I have done this many times.)Solid Performer
Fatshark Attitude
This is by one of the most respected fpv goggle makers out there, Fatshark is well known for their amazing customer support, and reliable goggles. These come with LCOS 1280x960 binocular-style screens with a FOV of 39°, (not the best FOV but certainly not the worst) and adjustable diopters. This is actually really important feature that allows you to adjust the close-up focal range. It comes with analog diversity receivers and is fully compatible with the Shark Byte HD module, which is pretty awesome if you plan to go digital later on and aren't interested in DJI. It has an HDMI port allowing you to plug in to your computer and see through the goggles while practicing on the simulator. This one comes without a battery so you'll need to remember to purchase that separate.Top of the Line
Skyzone 04X
I also have these and these are what I currently use. The screens are OLED 1280x960 binocular-style with a FOV of 46°, (better than the Fatshark Attitudes). These also have focus and diopter adjustments as do most of the higher end goggles. These also come with the 5.8G Sky-Fusion receiver, which merges two signals to one, and helps reduce image tearing and rolling providing a more stable viewing experience which can help when flying behind hills or trees. I think the receiver is pretty good and it supposedly stands up to other stand-alone receiver modules like the TBS Fusion or the Immersion RC Rapidfire. These also come with an HDMI port, removable micro SD card for the DVR. I always recommend recording to the DVR in case you crash somewhere out of sight and need to retrace your steps. Powered by a 2-3S LIPO, (also not included).
Chargers
Sadly battery charging is a big part of FPV, the sooner you come to grips with this the better. At best you should hope to get around 3.5 to 4 minutes of flight time whether you fly tiny whoops on 1-2S, all the way of to 6S 5" freestyle drones. The more confident you get at flying, the more you'll demand from your batteries as you practice new tricks and constantly drain and charge cells so you can get back and fly. Most tiny whoop read-to-fly kits usually come with a small USB 1S LIPO charger. These are probably fine to get started with, a lot of people look down on them as being fire hazards but I never had any issues with them personally. But charging safety is also something to consider very early on. You do not want to be charging any battery in an area that you wouldn't want to have an open flame in. LIPO batteries are made of volatile chemicals that can cause a fire if not handled properly. There are many YouTube videos out there with expert advise on how to charge safely, I highly recommend Mr. Steele's for starters. I actually store my batteries in a 50cal steel ammunition canister like this one out in the garage.
Best Swiss Army Budget Charger
SkyRC B6 A2 This is the one I currently own and use. For the budget conscious I think it's a solid choice. It has a single port for charging LIPOs or many other battery types with a maximum 6A charge current and 50W charge power. I can typically charge 3 4S LIPOs in parallel in a little over an hour, (you'll need a parallel charging board for that).Game Changer Charger
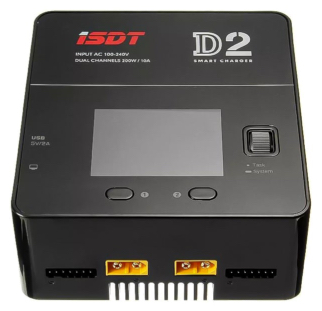
ISDT Mark 2 This charger adds dual charging ports, so you have more options when you have more batteries to charge. Typically when you go out to fly, you may fly different drones that don't use the same battery cell count. That creates a bottleneck when it comes time to charge or store your batteries. The rule of thumb is, you can generally safely charge LIPOs in parallel if they have the same cell count, same mAh capacity, and relatively the same voltage per cell. So you can see if you go into the field with different LIPOs, each drained slightly differently, you might not be able to recharge them all together, and you'll be forced to micro-manage the charging process throughout your day. Ugh 😣. You can use both AC / DC power at 0.1-15A x 2, which allows you to charge at home and out in the field. This one supports a wide range of battery types too.Top of the Line
HOTA D6 Pro Another dual channel charger, this one is probably faster and more efficient, supports 650W charging, than the ISDT Mark 2. Accepts both AC 100-240V / DC 6.5-30V allowing you to charge at home and out in the field with a charge power of DC 325W * 2(650W) / AC 200W. It also has a unique wireless charger that can juice up your iPhoneX, iPhone8, Samsung S8 and other modern phones. It has a micro USB connector which allows you to upgrade the firmware to help future-proof the charger, and it supports a wide range of batteries.
Tiny Whoops
Emax Tinyhawk 2

This bind and fly quad remains one of the most highly regarded whoops available because of its dialed in flying characteristics, and its amazing durability. There is a v3 version available that is supposedly even more durable, but this slightly older version can be bought for about $40 less and provides as much value for newcomers. The thing I can't stress enough is durability, because when you're just starting out you will be crashing into things constantly. Luckily this thing is strong and comes with prop guards which protects things including humans from being damaged by the props in a crash. Emax is highly regarded for making quality quads and this one is definitely legendary and a top choice for newer pilots. It might not be the fastest quad but it is tuned to fly extremely well and I don't think speed is something that new pilots necessarily need over control.Emax Tinyhawk 2 Freestyle

I actually still have this little beast, it still is a complete joy to fly. It is extremely light weight, quiet, and has enough power to perform freestyle tricks you probably won't have as much fun trying on its cousin the Tinyhawk 2. If you're looking for something a little more challenging, and you plan to do more outdoor flying, this might be the one for you. I've even seen plenty of people mounting Instago360 cameras to these which proves it has plenty of power. The one complaint I have about this amazing quad is the durability isn't quite there, though I've crashed it plenty and the carbon frame has held up beautifully. The main downfall is it uses a lot of nylon standoffs and nuts which simply snap after a few hard hits so you'll probably want to make sure you buy extra hardware parts which can be purchased here. I've done quite a few mods to this little ripper too, including replace the battery connector so you can plug in a single 2S LIPO instead of the x2 1S batteries it comes with. There are a lot of other mods people have done to this guy, search on YouTube and you'll find lots to improve this already awesome whoop.Mobula 6

Another legendary whoop, this one has more in common with the Tinyhawk 2, but I would consider it strictly for indoor flying, it runs on 1S LIPOs and doesn't have the power for outdoor flying. I think having less power for indoor flying is more ideal as you want maximum control for flying in more confined spaces. This whoop has a bit of a cult following and already has a newer version available but like the others, the version behind is a bit more affordable and still plenty of fun to fly.
5" Freestyle Quads
Coming soon...
Building Tools
Coming soon...
FPV Accessories
Coming soon...